
How I became a Google Developer Expert (GDE) for Android with the help of the #RoadToGDE program
Last week I became a Google Developer Expert (GDE) for Android. This was my second attempt at applying and it included me being a part of the Road to GDE program from Google. This article highlights my experience with the mentoring program and how it helped me become a GDE and how you can be one too.

What is a Google Developer Expert (GDE)?
A Google Developer Expert (also known as a GDE) is a highly experienced technology expert with expertise in Google technologies such as Android, Angular, Flutter and more. Nearly a thousand Experts are part of the program currently.
There are benefits to being a Google Developer Expert such as:
- Recognising their skills via Experts website and badges that
Experts may use in their social media profiles or personal websites - Facilitating access to Google product teams and projects,
including early access programs - Invitations to Google events around the world
- Supporting travel to conferences where they can speak about their
favorite technologies
In order to be able to join the Experts program, you first need to be referred by a Google employee or an existing Google Developer Expert. You will also need to meet the following criteria:

How I heard about the Road to GDE program
Late last year, while working closely with the Google regional leads in my Sub-Saharan Africa region, I applied to the GDE program. The first part of the application process is an eligibility check where the team at Google assess the applicant’s community contributions over the past year (you will need to provide all your community contributions on the application form). There are various items checked in the application including consistency (how often do you contribute to the community) and impact (how many people were affected by each contribution you made).
I did not pass the eligibility check and after reaching out for feedback, the reason was due to the scope of my contributions — I needed to increase the reach on a more international level as my talks for example, were mostly covering the Sub-Saharan region. My regional leads and I agreed to spend the next six months working on increasing my international reach before I attempt to apply again in the following year — this year. They also suggested pairing me with a GDE in my region who would act as a mentor to help me reach my goals.
As it was nearing the December holiday period, I took a holiday break with the intent of restarting my efforts in the beginning of the new year. It was in the beginning of the year that I discovered a tweet from the Google Developer Experts account on Twitter:

My regional leads also told me about it and advised me to apply. I had no idea if I would be successful or not, but I proceeded to apply to the Road to GDE program. About two weeks went by before I received the confirmation email:

There were about 1500 applications from around the world, and only 70 were selected including mine.
About a week after, I received information about who my mentor will be as well as the next steps. I was paired up with Filip Babić, a GDE for both Android and Kotlin and an amazing mentor:

After we had our Road to GDE kickoff meeting, it was now time for the mentees to set up their meetings with their mentors in order to kickstart their Road to GDE journeys.
What is the Road to GDE program?
The Road to GDE program is a three-month mentoring program with the intent on helping people from historically underrepresented groups in technology towards becoming a Google Developer Expert. In this program, the aspiring GDE’s, that is, the mentees, are paired with an existing GDE (the mentor) based on their area of focus (for example, Android, Angular, Cloud and so on), timezone and language.
During these three months, the mentor and mentee will have one-on-one discussions (up to five) organised by the mentee, where the goal of these conversations is to help equip the mentee, through guidance and predefined goals towards becoming ready to apply to be a Google Developer Expert. At the end of these three months, should the mentor feel their mentee is ready to apply, the mentee can proceed to do so. Otherwise, if they are not yet ready to apply, the mentee can continue to apply the guidance and mentorship provided to them and work on these outside the Road to GDE program until they are ready to apply.
Beginning the Road to GDE journey
It is the responsibility of the mentee to schedule the meetings as well as set up an agenda for each. This was done through the Advocu platform. What was key was to create a set of goals and align these with Filip so he could guide me towards achieving those goals. Each mentee will have their own set of goals and the idea is to have goals that can enable you to be ready to apply to the GDE program. I relayed my feedback from my first application and that my overall goal would be to increase my international reach with regards to my talks.
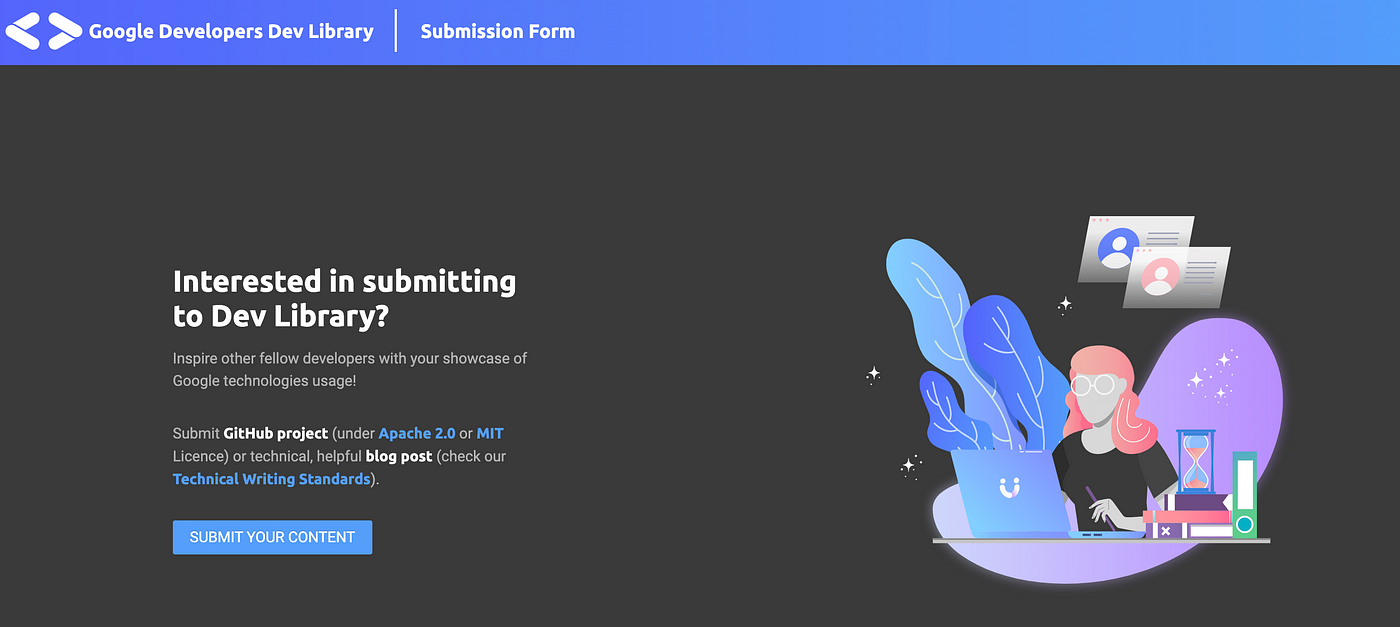
My talks weren’t the only thing I was doing over the past year as far as community contributions are concerned. I made it a goal to write a blog regularly — at least one a month. Then, I also made my app — Upnext: TV Series Manager — an open source project that the community can learn from. It was also during the first few days of being in the Road to GDE mentoring program that I submitted my open source app to the Google Developers Dev Library and it was accepted. I have a very detailed article on how I submitted here.

In addition, I am a co-organizer for my local Google Developer Groups (GDG) chapter — GDG Cape Town.
With this said, my goal with Filip was speak more internationally and Filip had the best idea on how to achieve that.
Increasing my reach — speaking more internationally
In North America, South America, Europe, Middle East, North Africa Sub-Saharan Africa, Asia and Oceania regions are communities called Google Developer Group (GDG) chapters. The idea behind each one is to foster a local network of developers that can connect and learn from each other about Google technologies through meetups, workshops, codelabs and even conferences such as DevFest. GDG Cape Town, where I am a co-organiser, is one such chapter.
Filip’s idea was for me to reach out to the GDG’s in Europe (as the timezone closely matches mine) and find out if they would be willing to have me as a speaker for one of their meetups. I found reaching out to the chapters for my request initially daunting but went ahead and drafted my emails. There is a website containing a directory for all the GDG chapters where you can also filter by region. I reached out to a huge majority of the European GDG’s and to my surprise had a very pleasant response from most of them.
In April, we had our mid-program event for Road to GDE where we all (mentees and mentors) met together again and briefed by the organisers on updates about the program and had more fun networking.
By the end of April I had spoken virtually at GDG Paris, GDG Oslo, GDG Osijek, GDG Berlin and GDG Berlin Android as well as at Conf42 Mobile 2022 Conference, (where my Call for Papers (CFP) was accepted prior to starting the Road to GDE mentoring journey). I am grateful to all the GDG’s that held a meetup for me.
In addition to this, I continued to contribute to open-source with my Dev Library project as well as blog. I also had a few more 1-on-1 meetings with Filip to discuss my progress and next steps. Filip also helped me understand the entire GDE application process and helped me prepare for it. In particular, after the eligibility check are two interviews — a community interview with an existing GDE and a product interview with a Google employee should you pass the community interview.
Filip helped me understand how both interviews are structured, what they focus on, and how to be better equipped for both.
I also reached out to more GDG’s, this time in USA, and there I received positive feedback from most of them. Two of these accommodated me and gave me dates to speak, which I was appreciative of, that would occur after my Road to GDE graduation.
The Mock application
During the Road to GDE mentoring program, we were each provided with a mock GDE application template where each mentor and mentee will work through. The template is a representation of the actual GDE application form but in doc format.
I completed my mock application, including my most recent speaking engagements — including the two upcoming speaking engagements in USA and shared the doc with Filip. After working through the feedback from Filip, he gave me further that he believes I am ready to apply to the GDE program. My intent was to apply once I had spoken at the upcoming USA speaking engagements.
Graduation
Shortly after this at the end of May, we graduated from the Road to GDE mentoring program. We had an amazing graduation event online where we also reflected on the previous three months and any notable events that happened during that time.
Those whose mentors had expressed support for their mock applications were invited to share them with the Road to GDE team. This is for the Road to GDE team to also take a look and share any comments or suggestions. I shared my mock application with them and I received feedback about two weeks later that they are in support of me applying to the GDE program.
After the Road to GDE program
I spoke at two GDG’s in USA — GDG Silicon Slopes (Utah) and GDG Dallas (Texas). Prior to me applying to the GDE program for the second time, I had managed to reach communities in both Europe and the USA. Community is at the heart of everything I do and I am grateful I was able to reach so many developers around the world who learned from me through my speaking, blogging, and my open-source code.
In July, I applied for the second time to the GDE program. Within a week I received confirmation that I had passed the eligibility check and I was moving on to the community interview section with a GDE.
We agreed on a date and met up not long after. The interview was very conversational, as it should be, as this is not a job interview, but rather a discussion about your community involvement. I received feedback the next day that I had passed this interview and moved to the final interview — the product interview with a Google employee.
We too agreed on a date and met a day after. We had a great in-depth conversation. This interview was more technical, but again not an interview, focusing on the specific area I was applying for — Android. The morning after I received feedback that I had passed the second interview!
Confirmation
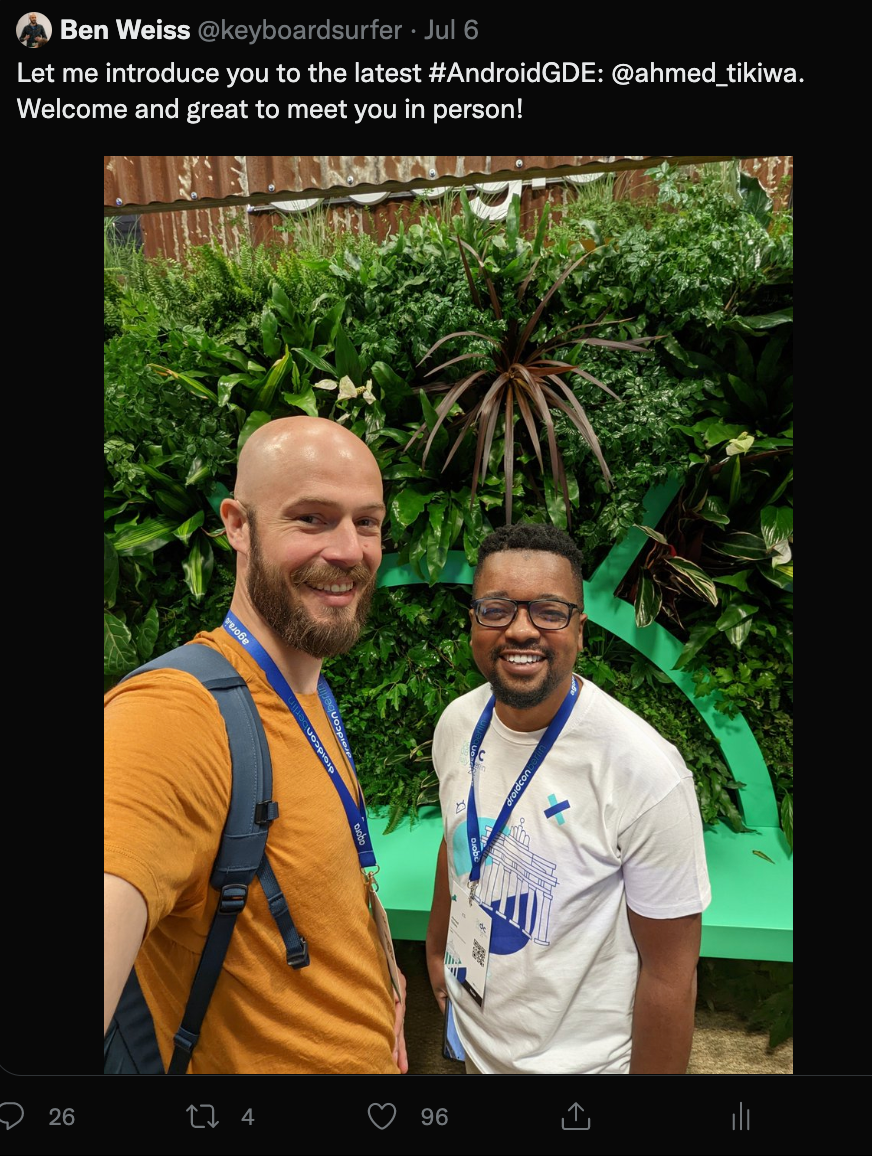
I had the honor of meeting
Ben Weiss, Senior Developer Relations from Google while I was at Droidcon Berlin 2022. Ben is also part of the Experts team at Google. He congratulated me on becoming the latest Android GDE in person and also shared it with the world via Twitter. No words could describe how amazing this moment was for me:
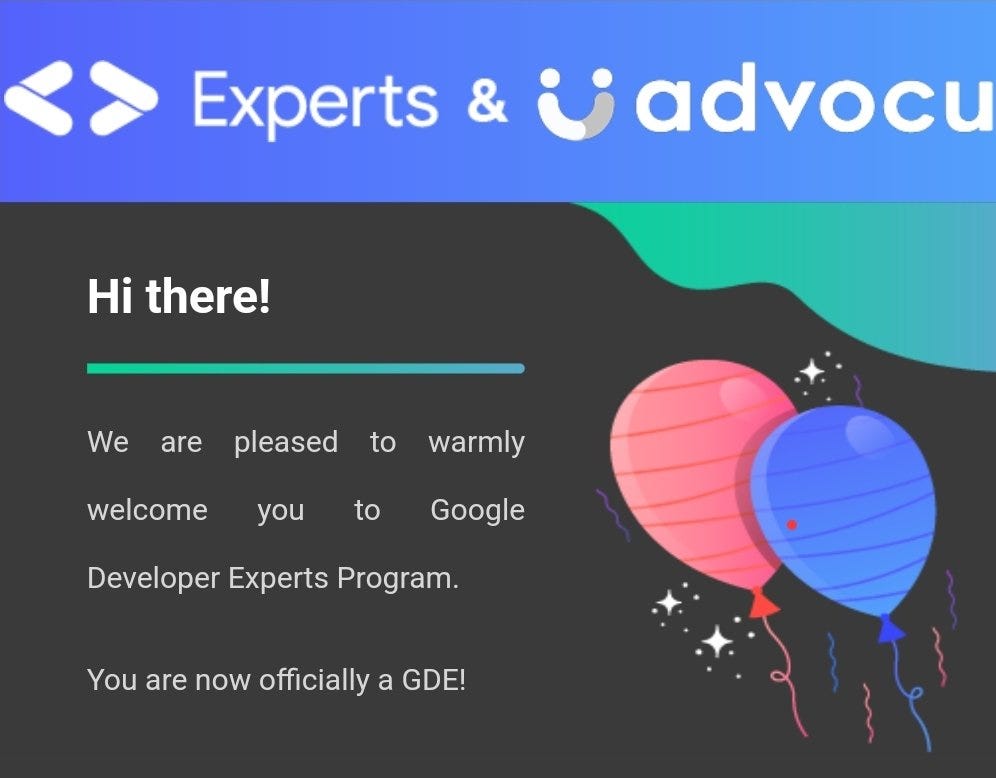
In the same week, I received the official email from the Experts team that I was now officially a GDE:
Conclusion
It would likely have taken me a very long time to become a GDE had I not been part of the Road to GDE mentoring program. I received really great mentorship from Filip Babić, my mentor, and through my experience with the program, I regard mentoring even higher than I did before. My mentor understood my goals, and what I wanted to achieve and gave me actionable guidance. I listened to him and that opened up so many doors and increased my community network.
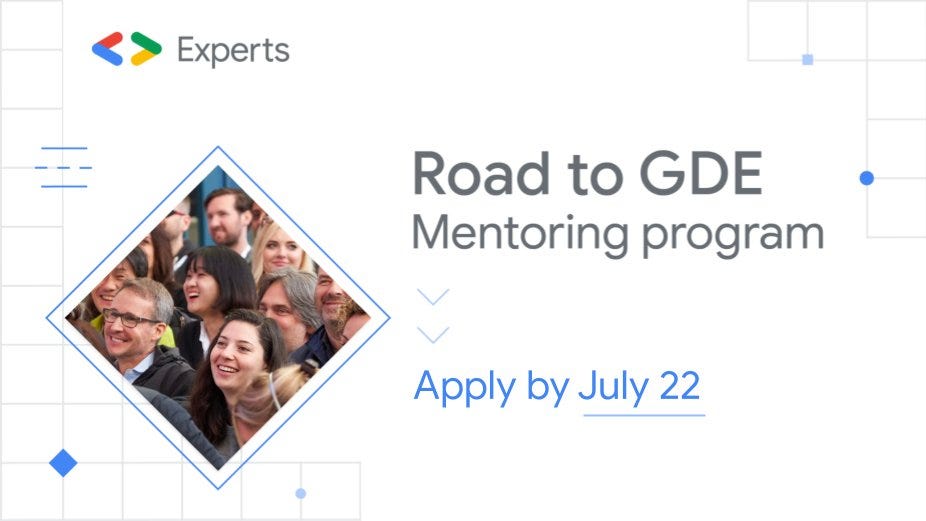
The Road to GDE mentoring program is now open for the fourth class with applications closing on the 22nd of July 2022. If you believe you are on the path to becoming a GDE, are passionate about your community, and are an active contributor, do apply. The program literally changed my life, and it can change yours too!
My journey to having my open-source Android app featured on the Google Developers Dev Library

Many developers are unaware of a platform called the Google Developers Dev Library and what it is about. I was one of those people and after finding out I was able to have my open-source Android app featured on the platform. In this article, I will outline my journey to becoming a Dev Library contributor with a featured app and what the Google Developers Dev Library is.
How I found out
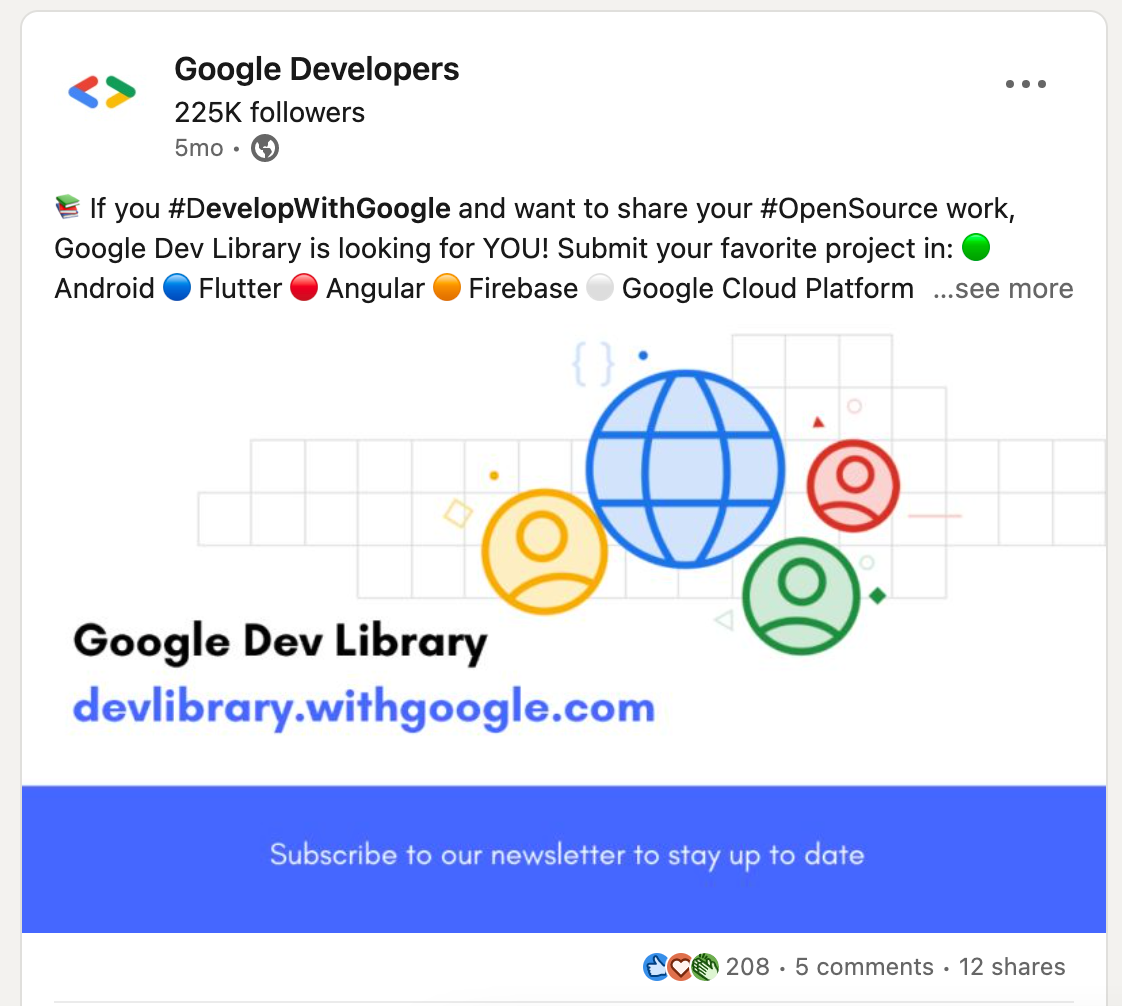
I first found out about the Google Developers Dev Library in a post on LinkedIn with the tag #DevelopWithGoogle from the official Google Developers account, inviting contributors to submit their open-source work. I of course was curious as all my app development centers around Google technologies and in particular my open-source app, Upnext: TV Series Manager.
What is the Google Developers Dev Library?
The Google Developers Dev Library is a curated platform consisting of technical content or software built using Google technologies, in particular, Android, Angular, Flutter, Firebase, Google Cloud, Machine Learning and Google Assistant. It is built with the intent to give developers from around the world a platform where they can showcase their usage of Google technologies as well as provide other developers with inspiration and tools which they can then use in their own projects.

Many developers find that they would need tutorial or project examples after reading documentation in order to help them better understand. The platform is, therefore, meant to help complement Google’s official documentation through learning from the technical content and featured projects on the platform.
When projects are submitted, they are carefully reviewed by product experts at Google to determine whether the submission is “high-quality, relevant, and unique”.
Apart from being featured, are there any other perks?
By being on the platform, your project or technical content will receive increased visibility. In addition to this, you will receive a contributor badge on your Google Developer profile, Google’s stamp of approval on your work and being also featured in Google Developers monthly newsletter.
Prerequisities for submission
In order for the technical content or project to be accepted on the platform there are a number of prerequisites that need to be met:
- Github license — for projects it is required that the project has a license, either an Apache 2.0 or MIT license.
- Properly documented README — your project’s README should be well-documented, well-explained and clear. For example, if the project itself has prerequisites such as API keys that need to be retrieved first or configurations that need to be first set up then these need to be explained fully. How the project is structured or libraries contained are information that would be vital in a README. Screenshots or other visuals can also be part of the README.
- Versioning — ensure that you are using the latest versions of software included in your project.
- Article monetization — ensure that articles are not behind any paywalls, do not have ads or getting monetized in any way.
- English content — for both technical content and projects, the library only currently accepts content in English, for now.
- Most recent — the content being submitted needs to be the most recent. Old or not recently updated projects may likely be rejected.
For technical content, there are also these guidelines which can be found here, for example:

Submitting my project — the first attempt
After cross-checking the above-mentioned prerequisites to determine whether my Android project met all the requirements, I then attempted to submit it. The Google Developers Dev Library uses the Advocu platform for submissions as well as relaying feedback to the content creators as to whether their projects have been accepted or not.
The form is a three part form where you will be required to provide details about yourself as well as the technical content or project that you are submitting. I provided all the details also specifying that my project is a Jetpack Compose project.
I submitted the form and waited for feedback from the platform.
First response
My project was rejected at the first attempt with the following reason:
The reasons for rejection vary from the quality of submission to the freshness of the project. For more reasons, check out our FAQ page. Also, please refer to the contributor guidelines for content improvement.
From this response, I wasn’t exactly sure which part of my submission was at fault so I reached out to the team through this form to try and find out more.
The Dev Library team is awesome, and their feedback was really quick as they responded within the same day via email. I expressed my uncertainty around the feedback and they were great to provide more details around what was amiss with my submission. At the time of my submission, my project was only partially using Jetpack Compose as I had only started on migrating it to Jetpack Compose. Because only part of the project was Jetpack Compose, the Dev Library team needed me to increase the Jetpack Compose coverage.
I proceeded to update the project, updating the UI’s from XML-based to Composable-based screens. I updated the README to reflect the new Jetpack Compose changes, ensured that the dependencies were all up to date and then proceeded to submit again.
Submitting my project — the second attempt
After submitting the project again via the Advocu platform, I received feedback within two days that my project was accepted!

It took about a week or so for my project and contributor profile to be visible on the Dev Library platform.
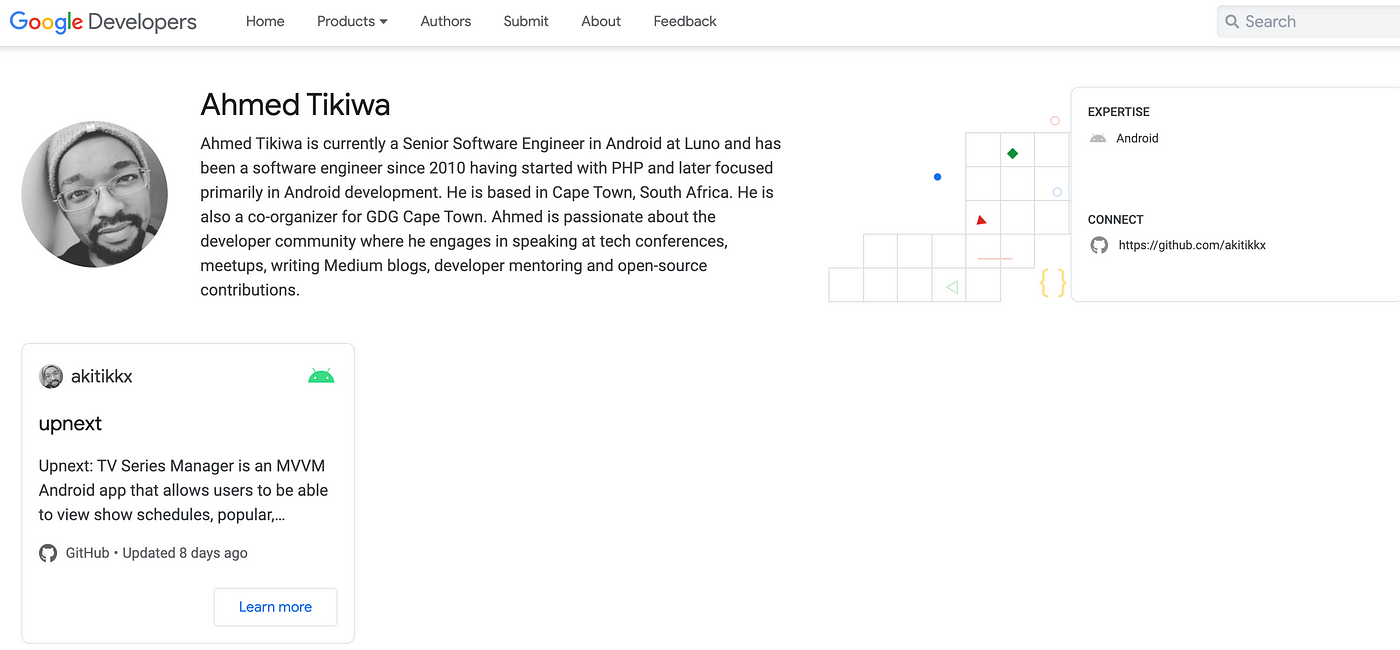
There is nothing quite like being featured with over 300 other developers from around the world on such an awesome platform. Developers can learn from your technical content or project about how to implement certain features in their own Google-based projects or how well-developed projects are supposed to be structured, organized and so on.
If you have technical content or an open-source project using Google technologies and would like to have it featured, do submit it to the Google Developers Dev Library.
Building an Android prototype app in three days with the help of Android Jetpack
In March 2020 I participated in the #BuildForCOVID19 Global Hackathon which was a call for developers from around the world to come together and build software solutions aimed at addressing the challenges that came about as a result of Covid-19. As part of my team I was tasked to build a prototype Android app and with a short development time of three days I used Android Jetpack‘s components to make this happen. In this talk I gave at GDG Cape Town, I go into detail of how I used Android Jetpack provided the accelerated development I needed to be able to build the prototype in such a short space of time.
The slides for this talk are available here
Joining the fight against Covid-19 with technology – Covid-19 Global Hackathon
Covid-19 has affected the world in a very devastating way. Many countries around the world are recording increases in positive cases on a daily basis. These cases and deaths due to the pandemic has resulted in many governments around the world instituting measures aimed at curbing the spread of Covid-19 which include total lockdowns. These lockdowns, for example here in South Africa, can be for 21 days where individuals are not allowed to leave their homes except for food supplies or medical needs.
These strict lockdown measures have left many around the world for example the underprivileged, the aged, small businesses from various sectors hugely affected and struggling to get by. This has led to many institutions in various sectors including myself looking at ways to help in this dire time.
The Hackathon
I came across a post from Mark Zuckerberg on March 25th 2020 asking software engineers from around the world to join in the fight against Covid-19 by participating in the #BuildForCOVID19 global hackathon. This hackathon was a collaboration with health organisations including the World Health Organisation (WHO) and companies across the tech industry with a goal aimed at building software solutions that aid in tackling some of the health, economic and community challenges facing the world right now. The engineers in the hackathon were joined by teams from Microsoft, Slack, Pinterest, TikTok, Twitter, WeChat, Giphy, Slow Ventures and more. I had no hesitancy in joining this hackathon in helping in this fight against Covid-19.

I signed up on DevPost as well as on Slack where the majority of the hackathon communication between the different teams took place. On Slack engineers would collaborate with other like-minded industry specialists, build or add to a team and turn their project idea into either a live working solution or a prototype. I came across a Slack post from FerasNaser.com for a project that was in need of engineers including Android to which I reached out.
I was invited to a Slack channel where in addition to the virtual meetings we had on Google Hangouts and Zoom, we coordinated with each other around the completion of our prototype. We had our first Google Hangout where we had introductions and Feras gave us a run down of the different potential projects he had in mind from which we were to pick one for the hackathon.
We all agreed on an educational solution for rewarding children with a virtual currency for completing a course on our platform. The aim of this project, which we called LIAM, named after my second-born son, was to allow children to learn, earn, create, sell and buy their creative achievements.
LIAM
Our multinational team consisted of Feras Naser an entrepreneur from Jordan who conceptualised the project idea; Eric Malaba from Uganda who configured our server using Cloudinary and Heroku and fulfilled the role of Web Tech Lead; Mohammed Thasheel from India, a React developer who helped build the website frontend; Sid Anand a student from Canada helped configure our backend; Joshua Odoi from Ghana who contributed to the website design flow and development and I served as Mobile Tech Lead and built the Android prototype app.
We hit the ground running with development starting from the night of Friday 26th March 2020 getting the backend ready for the mobile app and website. We had meetings at various points across the hackathon to discuss the progress and address any issues we might have had.
Lessons learnt
Towards the end of the hackathon we had issues deploying our backend server to a public environment accessible to the frontend clients. Due to this delay it left very little time for the frontend clients especially Android to integrate the backend API on time. Our product then had to be a prototype as the live data was not quite ready for the frontend clients. Trying to sort out these issues was a real challenge for the team and each member was feeling the pressure to deliver a product we would all be proud of.
We all coded furiously across the hackathon period until the night of Sunday 28th March with very little rest in between. From working until late the Friday and Saturday then waking up at 5am to resume coding again. Despite the little rest we were all motivated by the potential impact of our project for children around the world, we all wanted this product out there for the world to use one day. We all pushed through the various technical issues we had and submitted our project the Sunday night.
Each of us can help in one way or another during this devastating time facing the world, offering our services to those in need. Identify a need in your community or around the world that you could help address. By working together we can beat this pandemic.
Q-lued up with Android 10: Understanding the privacy requirements of Android 10
Recently I spoke at DevFest South Africa 2019 about the new privacy features that have been added as part of Android 10, formerly called Android Q. Over the years Android has seen exponential growth and with that growth a vast number of functionality has been added to the Android ecosystem. There has however been one thing lacking – allowing the user more control over their privacy. Apart from the usual UI updates and the new Dark Mode, Google has taken a deliberate stance with providing users the control they have so desperately needed.
In this session, I discussed the top privacy changes that are part of Android 10 and why these changes are important to both Android users and developers. I touched on the following changes and how developers can adapt to them:
Access to external storage – Android 10 has updated the way in which apps now have access to external storage. Creating a mechanism that ensures apps only have access to what they need through what is defined as scoped access.
Background device location – Users never really had control over how apps had access to their location. Once location access was granted apps would essentially have this access even when the app itself was not in the foreground. Access to the device location has been updated to focus on the user being in control of when an app should have access to the location.
Background starting of activities – in an effort to keep the user’s experience uninterrupted, Android 10 introduces changes to ensure that the user has more control over what is displayed to them on screen.
MAC address, network state – changes have been made in Android 10 where access to certain fields or properties has become restricted in the interest of privacy for the user.
Wi-Fi – Restrictions have been introduced about what can be accessed or what action can be performed when it comes to connectivity.
Permissions – before Android 10, the permission structure was one of two – allow always or don’t allow. The changes introduced allow the user to have more control about when such a permission can be granted.
Rediscovering My Passion for My Career as a Dev
By Ahmed Tikiwa, originally published on OfferZen
Years ago, being a professional developer involved following a rigid and narrow path of education. Today, this path has become wider, which offers developers endless possibilities to become the dev that they want to be. In this article, I will discuss the obstacles I encountered in going from feeling unchallenged at work to rediscovering my passion. This helped me become more sought-after in this fast-growing industry.
An app as my springboard to new horizons
I worked as a PHP developer for a web and mobile development company for over five years, while mainly assigned to a single project. As the years progressed, the growth scope of the project remained limited. Working on one single project became very tedious and unchallenging, with very few growth opportunities.
Around my third year at this company, I had a spark of inspiration to build an app that would make it easier to find information on US television series. The exciting nature of these shows had me interested in finding out when the next episode would air, but doing so was difficult and involved a number of Google searches that could easily be eliminated by an app. In order to build it, I needed to upskill myself because my PHP knowledge wouldn’t be enough for the various tools I’d eventually have to use.
This springboarded me into my greater journey: I recalled advice from my mentor about the value of having multiple programming languages in one’s toolkit, each with its own strengths, limitations and best use-cases. Specifically, I needed to learn how to develop apps in Android. Taking those first steps led me to a number of challenges:
- Finding the right teacher
- Feeling like I didn’t know enough
- Battling with time constraints
Whenever I overcame one challenge, a new one seemed to appear. However, it was overcoming them that ultimately made me a better developer and enabled me to find that passion that I seemed to have lost.
Finding the right teacher
My first challenge was finding the right teacher – and not just a mentor, but a teacher who would inevitably offer exactly what I needed in order to become a better developer. Over time, each teacher I encountered online made me realise that not all of them carry that natural ability to deliver the information they know in a way that is captivating or that encourages the learner to ask questions. In order for me to excel, I needed to ensure that I picked the right teacher.
I did a lot of research online and found two promising avenues for learning the Android skills I needed: Udemy and Coursera. Each option gave a preview video of what the course entailed, as well as the costs involved – both financially, and in terms of time. I found myself leaning towards the Coursera option, as the lecturer teaching the course had two important qualities: very good knowledge of the content, and a way of explaining things that suggested he had a good approach to teaching. I enrolled into the course, which spanned over a period of eight weeks.
Not long after I had completed the eight week course, I came across another Android course, this time offered by Google and Udacity. This Nanodegree course – a collaboration between these two companies – was exactly the type of product developers like myself need in order to advance themselves as Android engineers. Not only was the course tried-and-tested, but it was being used and delivered by high-ranking companies.
I had no hesitation in enrolling into the course, as the benefits were clear: the majority of the graduates went on to work for top companies around the world, and all that was required was hard work. This course also set itself apart from all the other Android courses as it was offered by Google, who own Android anyway. The rewards I received at the end were worth the high expectation of time and effort. Having done sub-par courses in the past, I came to realise the true value in finding the right teacher.
Feeling like I didn’t know enough
My second challenge, then, centred around me as a developer. This was something I battled with even during the time I was completing the above courses. I had a desire and a passion to build Android apps, but my obstacle was the confidence in my knowledge and expertise to be able to execute this desire. My hunger to know more is what motivated me to continue.
I also felt like I didn’t know enough during the job hunting process with a particular company I encountered. This company specialises in making use of graphics in their apps, and use a very specific Android library to achieve their requirements. I knew I had aimed at something more challenging, but they declined to continue with the interview process because I had not encountered this library before – not even in the Nanodegree.
This, however, did not discourage me. Instead, I realised that you can never be satisfied with the knowledge you have. After the Nanodegree, I continued learning, and never stopped finding out what new libraries were being added to Android. I read articles and watched videos, all with the goal of learning more – and this is something I continue with to this day.
Battling with time constraints
It is not easy studying part-time, being a husband and a father, and still working full-time. A lot of time had to be sacrificed after-hours in order to be able to juggle everything at once. The Udacity course alone took close to a year.
Typically, every fortnight to a month, you would be required to submit a project, which was an Android app that you would build from scratch or improve on based on the lesson requirements. This meant spending very little time with my family after work, and working through the evening until just after midnight. After about a month or so, I had to change from working three nights a week to working every night, as the deadlines were fast approaching and required more time.
Thankfully, my wife was incredibly supportive because we both value education. There were times when I felt so burnt out that I considered whether it was worth doing the course at all, putting in hours that I could have been spending with my wife and kids. Without my wife’s support, the time constraints would have gotten the better of me.
When I graduated with my Nanodegree, my Android knowledge had grown to the point where I could confidently search for new opportunities as an Android engineer.
Finding a new job
After I completed my eight week course, I was fortunate enough to be offered a position as an Android developer in addition to working as a PHP developer at my company. I would split my day between the two languages, working on either language for half of the day.
After working like this for a couple of years, I wanted to fully move over to Android. My company however was not able to offer a removal of the split, as the PHP side required my daily involvement. Sadly, to continue pursuing my passion, I had to start looking for work elsewhere.
Despite not having any luck initially, many recruiters contacted me with various opportunities after seeing my updated LinkedIn profile. One in particular had an Android developer opportunity that interested me, from a leading online fashion retailer. Although this would mean going into a new, unfamiliar industry, I was intrigued. I went for the interviews, did the required project, and got offered the job.
Getting this offer was a huge turning point in my life. It showed me that all the hard work, the late nights and the sacrifices had finally paid-off. Each challenge brought a valuable lesson, which have culminated into me getting the position I am in today. I know that this opportunity was certainly not the last, and only the beginning of my career as an Android engineer. I did this despite the amount of time and hard work required on my part, and by the end I had managed to fulfil my goal: I was able to create Android apps, add a skillset to my expanding toolkit, and rediscover my passion and my fulfilment.
Generate a free SSL certificate with Let’s Encrypt and Certbot
Acquiring an SSL certificate can be expensive especially when you are running a website that is not necessarily generating any form of revenue like a blog. Thankfully Let’s Encrypt has provided a mechanism for generating an SSL certificate for your website for free. These certificates, however are only valid for a period of 90 days at a time and can be updated with a simple shell command when they are due for renewal. This article will show you step by step on how to generate a certificate for your website using Certbot ACME client. You will need to have shell access to your web host in order to be able to install and run Certbot.
Cerbot Prerequisites
There are some pre-requisites for setting up Cerbot:
- You need to be comfortable with using the command line and execute shell commands
- You need an HTTP website that is already online. If you have not done so yet, you will need to set this up first before continuing with this article
- This website needs to be hosted on a server that you can have SSH access to with the ability to sudo
Installing Certbot
SSH into your web server and run the following commands to get Certbot installed:
$ wget https://dl.eff.org/certbot-auto
$ sudo mv certbot-auto /usr/local/bin/certbot-auto
$ sudo chown root /usr/local/bin/certbot-auto
$ sudo chmod 0755 /usr/local/bin/certbot-auto
Running Cerbot and generating the certificate(s)
To get an SSL certificate and have Certbot edit your Apache configuration automatically to serve it, turning on HTTPS access all in one single step, simply run:
$ sudo /usr/local/bin/certbot-auto --apache
This command will run a scan of the Apache configured websites on your server and present you with options for which site or sites the Certbot can generate an SSL certificate for:
Saving debug log to /var/log/letsencrypt/letsencrypt.log
Plugins selected: Authenticator apache, Installer apache

Which names would you like to activate HTTPS for?
- - - - - - - - - - - - - - - - - - - - - - - - - - - - - - - - - - - - - - - -
1: mysite.com
2: othersite.com
3: myotherothersite.com
- - - - - - - - - - - - - - - - - - - - - - - - - - - - - - - - - - - - - - - -
Select the appropriate numbers separated by commas and/or spaces, or leave input
blank to select all options shown (Enter 'c' to cancel): 1
Once you have selected your option from the list and pressing enter, the Certbot will begin the generation process:
Obtaining a new certificate
 Performing the following challenges:
 http-01 challenge for mysite.com
 Waiting for verification...
 Cleaning up challenges
 Created an SSL vhost at /etc/apache2/sites-available/mysite.com-le-ssl.conf
 Deploying Certificate to VirtualHost /etc/apache2/sites-available/mysite.com-le-ssl.conf
 Enabling available site: /etc/apache2/sites-available/mysite.com-le-ssl.conf
Certbot will then present you with two options for HTTPS redirection:
Please choose whether or not to redirect HTTP traffic to HTTPS, removing HTTP access.
 - - - - - - - - - - - - - - - - - - - - - - - - - - - - - - - - - - - - - - - -
 1: No redirect - Make no further changes to the webserver configuration.
 2: Redirect - Make all requests redirect to secure HTTPS access. Choose this for
 new sites, or if you're confident your site works on HTTPS. You can undo this
 change by editing your web server's configuration.
 - - - - - - - - - - - - - - - - - - - - - - - - - - - - - - - - - - - - - - - -
 Select the appropriate number [1-2] then [enter] (press 'c' to cancel): 2
If you choose option 1 then no further changes will be made by Certbot. If you choose option 2, then Certbot will update the virtual host configuration for the site it generated the SSL certificate for:
Redirecting vhost in /etc/apache2/sites-enabled/mysite.com.conf to ssl vhost in /etc/apache2/sites-available/mysite.com-le-ssl.conf

 - - - - - - - - - - - - - - - - - - - - - - - - - - - - - - - - - - - - - - - -
And that’s it! Certbot has successfully generated an SSL certificate for your website for free!
Congratulations! You have successfully enabled https://mysite.com
Testing whether the SSL certificate is working correctly
Certbot will provide you a URL to check your SSL certificate status after it has completed the generation process.
You should test your configuration at:
 https://www.ssllabs.com/ssltest/analyze.html?d=mysite.com
 - - - - - - - - - - - - - - - - - - - - - - - - - - - - - - - - - - - - - - - -
You can also check the https version of your website which should now work and display a lock next to the URL.
Things to note
There is also some additional important information that is displayed by Certbot. This information includes details about where the certificate and chain are stored on the server and when the just generated certificate is due to expire, so pay attention to this:
IMPORTANT NOTES:
  - Congratulations! Your certificate and chain have been saved at:
    /etc/letsencrypt/live/mysite.com/fullchain.pem
    Your key file has been saved at:
    /etc/letsencrypt/live/mysite.com/privkey.pem
    Your cert will expire on 2019-10-19. To obtain a new or tweaked
    version of this certificate in the future, simply run certbot again
    with the "certonly" option. To non-interactively renew *all* of
    your certificates, run "certbot-auto renew"
  - If you like Certbot, please consider supporting our work by:


    Donating to ISRG / Let's Encrypt:   https://letsencrypt.org/donate
    Donating to EFF:                    https://eff.org/donate-le
Setting up a cron to update the SSL certificates for you
Remembering to update the certificates when they are due can be a tedious process. Thankfully Certbot can also be executed by a cron job which will periodically check for you if any of the certificates it generated are due for renew. Simply run the following in the terminal which will add a cron job for you:
echo "0 0,12 * * * root python -c 'import random; import time; time.sleep(random.random() * 3600)' && /usr/local/bin/certbot-auto renew" | sudo tee -a /etc/crontab > /dev/null
Help and Support
Should you encounter any errors with Certbot, feel free to visit the Certbot Help page which contains a list of helpful information.
I hope this article was very helpful. Now go and generate those certificates!